DIY
Showing posts with label DIY. Show all posts

DIY Burlap Fabric Pumpkins


These fabric pumpkins turned out so cute. I found the perfect sized pumpkins by The Spruce. You can get their free sewing pattern here. They have it titled as pumpkin pillows but if you just follow their tutorial for the body, you can add whatever type of stem you'd like and use whatever kind of fabric. I wasn't looking for pillows, more like just for decor but again the sizing of these worked out great. I took the large pumpkin pattern and scaled it up about two sizes more to make the really big pumpkin.


I also found this tutorial for upcycled pumpkins. If I didn't have so much of this fabric already I would've definitely done this one. You can check out the how-to by Evie Bidell, here.


I have had this orange burlap material for years and it never occurred to me that it would be great for some fake pumpkins. It would be good for some fake carrots too but those don't really say fall as much as they do Easter. Anyway there is so much of this material that I was tempted to make huge pumpkins but then I wasn't sure where I would put them since I don't want them outside.


This craft also allowed me to make use of some fabric samples that were from a company I no longer order fabrics from. I took all the green shaded taffeta swatches and some crepe satin but only ended up using the taffeta. Taffeta is awesome to work with because it's stiff, lightweight and you can easily singe the edges. It's basically the paper of fabrics.


For the trunks or stems rather, I got a roll of faux burlap ribbon. I knew I only needed small pieces so I went with the ribbon instead of buying fabric. Added bonus the ribbon has sealed edges making it even easier to work with.


I sort of followed the given pattern for the stems but not really because mine are not as curved nor as tall. I gave them a little stuffing too. For the pumpkin leaves I cut away the pieces of swatches that had glue residue from the booklet they were in and cut out some pumpkiny looking leaves. 


Then I singed the edges of the leaves with a candle and hot glued a little pleat on them. Also hot glued some of the stem edges inward to create a flatter base.


First I glued on the leaves then the stem on top. I added some bows made out of twine for added decoration. It's not much but looks cute all together.


So fabric pumpkins are pretty easy to make whether you sew or not, there are plenty of tutorials out there showing you different methods to get it done. (Just search "no sew fabric pumpkins" on google or Pinterest) Real pumpkins are nice but they are one time deal, they're a fruit (yes, technically because it has seeds) and are better cooked up and eaten than wasted. Make these pumpkins and you can re-use them every autumn. 


Here they are sitting on the piano. The middle pumpkin is almost too big for this spot but I like how they look all lined up. I'm thinking some wooden letters or signs would accompany them really nicely. Maybe like the words "give thanks" or even "fall" would work. I hope you give making your own reusable pumpkin decor a try. 

☮♥♻


DIY Upcycled Plastic Bottle Cap Pincushion Ring


For this little project, I re-used a small gatorade bottle cap. In my opinion it's the perfect size for a pincushion ring. The regular size gatorade bottle cap is probably perfect for a pincushion bracelet.


I referenced the tutorials below, they were super helpful. One thing I did different though, was use a leather hole punch to make the holes in the cap for the elastic. As long as the plastic isn't too thick it should do it, it did the gatorade cap.

Basically all you do is take a thin elastic and run it through the holes. Make it loop and your size then knot the ends in place. I made my fabric circle 4 inches in diameter (using some leftover cotton from this previous refashion of mine). Gathered it, stuffed it and hot glued it into place. Lastly, I took a 3/4 inch cotton lace trim and wrapped it around the lid edge for embellishment.


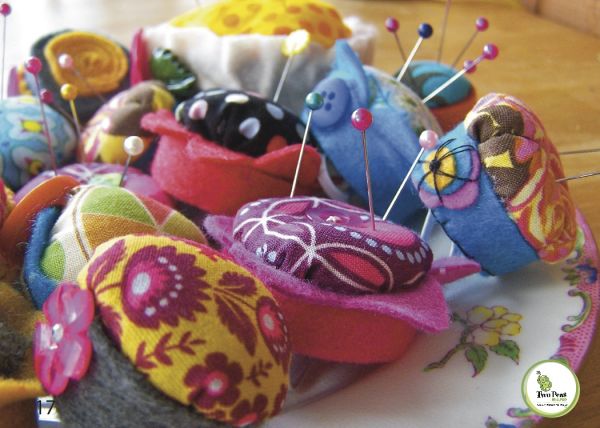
Or maybe you don't want a ring and would rather take a candlestick holder and upcycle it into a multiple pincushions holder like this one:

Or create whole new apparatus with old silver and have space for just not pins but other sewing notions as well, like this one by Todolwen

☮♥♻

DIY Sensory Cube for Baby

 thee Inspiration:


I originally found the cubes on Pinterest but each blogger has made excellent tutorials that are easy to follow.

The cube is pretty simple by itself. Just use different textured materials (perfect upcycling project) and add on things like buttons and rings for added interest.

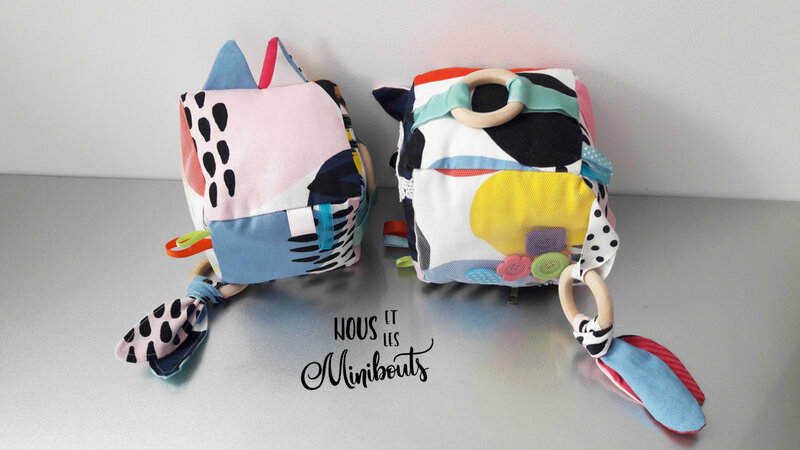
Here is what I came up with:


Like I captioned my reel, I made the sensory cube made with odds and ends of materials I had lying around. I think it came together nicely but definitely should’ve added interface to the squares to have them keep their shape and no topstitching because it ended up getting in the way of the final put together. It was a fun little project. You can get really creative with it. Reuse and upcycle materials you already have. Add things that will make noise and personalize it for your little one with their name.


☮♥♻

Bubble Theme Birthday Party Signage - Thanks for Popping By!

  Here I'm just sharing some printable/cuttable images I made for my son's bubble themed birthday party.

First up is a bubble station sign that I used my Silhouette cutting machine with. Vinyl on wood (Unfinished Wood Arch Shape). 


This was the Bubble Station sign up close right away I was done putting it together. I painted the wood panel with an Ombre effect to match the piñata I made and used a glossy iridescent vinyl.

Terribly zoomed in pic, sorry. Anyway here it was in action. Surrounded by various different bubble wands and tools. The bottom group of bubbles on the sign were the inverse/leftover cut outs of the top bubbles. I didn't want to waste the vinyl and it worked.


Next are thank you labels. The bubble buddy I didn't end up using but I thought it would have been funny and totally on theme.


This image of "Thanks for making this birthday POP" I did use. Again cutting machine and vinyl in an iridescent frame from the Dollar Tree. This thank you note was placed by the party favors on the gift table.

Party favors consisted of bubbles (of course), shiny bubble stickers, pop tubes and a mini pop fidget keychain. The iridescent treat bags were from Walmart.
In color for printing

In black for cutting

DIY Upcycled Solar Lamp Posts

Robin @ ReDo It Yourself Inspirations has post segments called "Cut the Cord". She provides so many clever ideas for outdoor lighting solutions sans conventional electricity.
A while ago I had seen a photo on Pinterest from her posts. Later I took a trip to a local flea market and found these lamps without shades that were perfect for this project.


I had not realized how almost identical they are to the ones used in the inspiration photo. Pretty close right?


So I did the same thing. Took out the wiring, electrical components and cut the cord! Then I spray painted them black to match the solar lamps. I used Rust-Oleum Spray Paint, in Satin Canyon Black.


I didn't glue the lamps on though. They actually fit right into the post so I don't think the glue is absolutely necessary. If I see that they get affected by wind then I'll glue them down. They turned out really cute though and make excellent front door accents.


I hope you give this a try too.


Solar is the future and the future is now!


Refashion | An Old T-Shirt + Scrap Piece of Fabric


thee inspiration:


Giving color and pattern to a solid comfy t-shirt, looks simple enough to me. I had this bright red-orange tee and a remnant of fabric leftover from this wrap and tie pantskirt I made. This fabric piece just goes so well with the shirt. It was meant to be.

First I did was mark how high I wanted the center back. I basically made go to where the front neckline is. Then fold the shirt in half, with side seams meeting in the middle. Create the shape you want for the front and back "v"s. Well I guess the back is more curved than a "v" but you get it. I had the front "v" end right above the belly button.

Once that was cut out (leaving a 1/4" seam allowance) I took my scrap piece of fabric, evened it out and sewed it in half lengthwise. The piece was 37.5" long by 30" wide so 15" when folded in half.

I have a similar shirt that I like the back length of so I used it as a reference. Within this piece of fabric I was able to get both front and back pieces. Starting with the top back curve.

Then the front after the back is all cut out. Make sure the width is the same as where it meets up on the sides. After that I had it flare out some since this fabric doesn't stretch like the t-shirt does.

So the seams on the fabric will end up in the middle and should then be sewed to your t-shirt. I did the front first then the back.

I wanted the front middle corner to line up exactly with the middle seam of the fabric. It was a little tricky but got it eventually.

After the front is attached to the front and the back to back you can serge the raw edges. Then you can attach the sides together and serge those. After all that even out the bottom a bit, get it how you want and hem it.
All done!

Renew & reuse!

☮♥♻

Refashion | DIY French-Knotted Upcycled Cardigan


thee Inspiration:


I had been collecting and using thrifted embroidery hoops for years now. Not to sew on or with but as wall decor above my sewing space. Along with the hoops one day I found a bag of brightly colored doilies so I put them together on display. I also found some interesting frames I then turned into another decor piece featuring used measuring tapes (DIY post about it here) and two pin cushions. 


A few years back I got an embroidery thread set from an aunt as a gift and since then it piqued my interest to actually try embroidering by hand. I learned some stitches by watching tutorials on youtube. I bought more thread and I embellished this upcycled denim crossbody bag with it:


Then I saw that grey cardigan from Anthropologie and I thought to myself, it is completely doable. I had this fuchsia cardigan I've worn a couple times. It's not a V-neck but it's plain and could certainly use a little revitalization. The French knot confetti embellishment is perfect.


If you don't know how to make French Knots, check out this video I watched to learn how to make them (they are super simple!): How to Sew a French Knot Stitch by Professor Pincushion

Initially I thought I would be using an embroidery hoop to keep the cardigan nicely stretched but I ended up not really needing it. I guess I should've just used a much smaller hoop instead. It would've helped but I think it turned out fine, you might not need it. This is what I ended up with so far. It's definitely not as full as the Anthro cardi but I can always add onto it. If you have a plain cardigan in need of some flair, just add sprinkles!


☮♥♻